Saturday, April 30, 2005

DIY: Pioneer Aux Input

Parts list:
- 1/8" Stereo Panel-Mount Jack (Catalog #: 274-248)
- 1 ft. Stereo Patch Cable (Catalog #: 42-2497)
- Hookup Wire 22 AWG (Catalog #: 278-1221)
- Electrical Tape
- Pioneer in dash radio with CD-Changer Controls (mine is a DEH-P9300)
- Pioneer IP-Bus cable from CD-Changer (CD-IP150, CD-IP151E, or CD-IP28)


Project at a glance: creative muvo mp3 player -> stereo patch cable -> audio jack -> Pioneer CD changer IP-Bus -> DIY Pioneer Aux Input

Think: Over the past couple of years I have upgraded my Pioneer Car CD changer to meet my needs. I went from a 6CD to a 12CD and now I have a portable MP3 player I want to connect. Pioneer offers an auxiliary adapter (CDRB-10) for ~$40 or an iPod adapter (CD-IB100) for ~$130. The auxiliary adapter appears to be a simple input-to-RCA-out, so I decided to make an aux adapter myself for ~$6. A quick tally of the cost of the parts listed is ~$12 bucks but you'll have plenty of wire for your future projects and an extra stereo jack. :)

make_diy_connected_w_radio_2


Create: The first task was to figure out how to get the input from the MP3 player into the head unit. The solution is simple, most Pioneer decks have an option to turn on the AUX input and it so happens that mine is one of them.

To enable the AUX input complete the following:
1) Power down the unit (hold the source button)
2) Press and hold the #1 (or in my case hold first soft key next to the back key)
3) Select AUX, and then use the up arrow to turn it "ON"
4) Press the source key until you see "AUX"

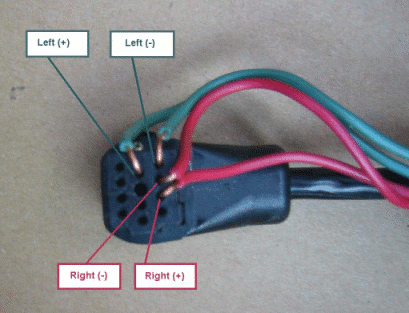
Once the deck is set to the AUX input it is expecting raw audio from a device attached to the IP-Bus. Now the trick is to see which pins on the bus are for audio. After many trial and error attempts, I have locked down the following setup for audio inputs on the IP-Bus:
wired_inputs_labeled_scaled
Figure 1. IP-Bus pin input. (I chose the least invasive method of connecting with the IP-Bus.)


Now to connect the 1/8" audio jack to the IP-Bus, we need to solder the 22 AWG hookup wire to the legs of the jack. The (-) leads share one leg and the (+) leads have their own separate legs as shown here:
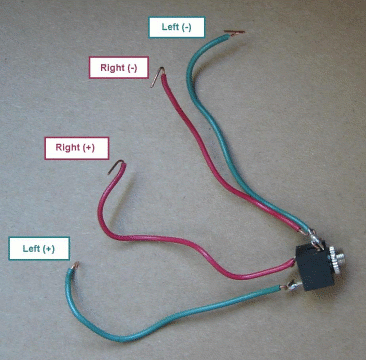
connector_labeled_scaled_4
Figure 2. 1/8” (3.5mm) Audio jack wired up.


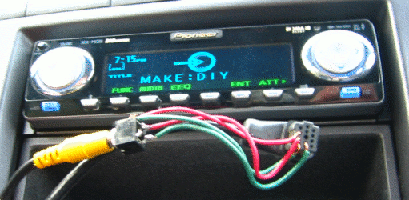
Inserting the wire into the IP-Bus and bending it over the edge will create the angles at the end of the wire. This will provide a flat surface for us to tape the wires in place. You could go extreme and split open the IP-Bus and fish out the wires or go for the classic tape and zip-tie route I took.

Complete: Once we have the audio jack wired up the next step is to place the wire leads from Figure 2 into the IP-Bus as in Figure 1 and give it a test run:
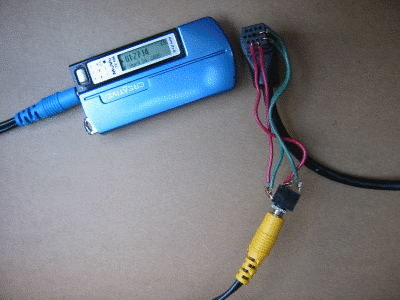
mp3 player connected to IP-Bus.
Figure 3. Connect MP3 player using the audio patch cable to the audio jack.


Success, the audio is playing! Now I took a little extra time and labeled the input from "AUX" to "MAKE:DIY". Complete the following to adjust the title: Function -> TTLin -> ABC -> Up and down arrows to enter your personal title -> ABC key to toggle upper and lower case -> right arrow all the way one past the last entry -> Back soft key -> done.
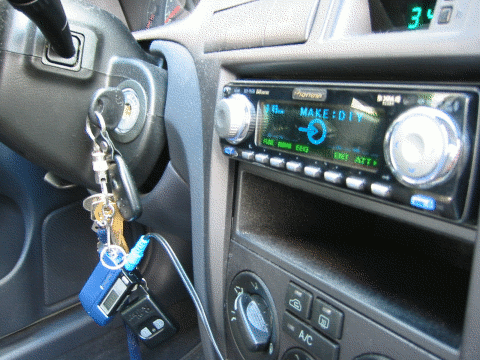
side_view_30_scaled
Figure 4. Apply the tape, zip-ties and tuck everything away so it is nice and neat.


Optional: If the sound is low at the max volume of the MP3 player then the AUX sound level can be adjusted using the SLA (source level adjustment). While in AUX mode complete the following to adjust the SLA: AUDIO -> NEXT -> NEXT -> Press SLA -> Press up or down to adjust the source volume -> done.

This DIY idea can be applied to other stereos with CD changer inputs with the proper wiring diagrams. Please post any similar projects in the comments for all the to see. The official Pioneer auxiliary input might have some advantages because of its "gold" connectors and possibly some internal circuitry, so consider this option if you want the absolute best sound with this configuration.

glowing_deck_scale_20
Enjoy the DIY: Pioneer Aux Input!


nickc316 at gmail.com
Saturday, April 23, 2005

Tunecast update

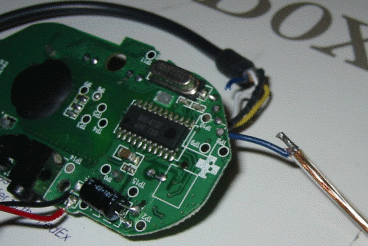
Think: I posted that I was not happy with the range from the Belkin RF transmitter so I decided to used John Riney's comment and added some wire to the internal antenna of the Belkin Tunecast II from the link: tunecast antenna mod.

Create: The instructions are clear and well documented at the link above so i won't rewrite them here. Just really be careful with the battery leads b/c they are very fragile as i had to repair them 2x's :)

ant_connected

Found the blue wire labeled "ANT", snipped it, soldered it, and taped it up.

closed_connected

Closed it back up and pulled the wire easily out the other side.

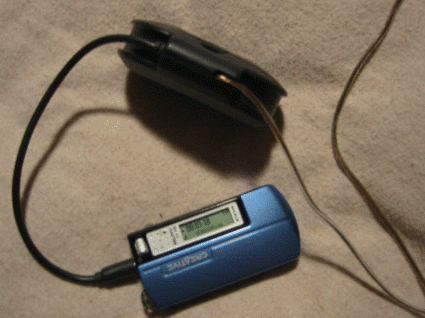
Complete: I didn't get the full range i was looking for, only added ~1' of wire, but after placing the modified tunecast next to the podcast shower radio I have no more random pops and fadeouts! Thanks John!


nickc316 at gmail.com

Thursday, April 21, 2005

DIY: podcast shower radio

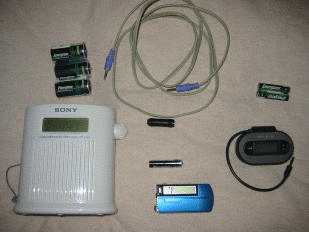
Part list:
- Sony ICF-S79V (or any battery powered shower radio)
- Creative Muvo TX FM (or any player willing to take some steam)
- Stereo-to-stereo audio coupler (~$2 bucks at the shack, 274-1555)
- Audio patch cable (stereo to help out the FM transmitter)
- Belkin Tune Cast II FM Transmitter with auto-off
- Energizer Ni-MH rechargeables and charger

Project at a glance: creative muvo mp3 player -> stereo wire -> RF transmitter -> RF input of 87.7FM -> Sony shower radio

radio_tuner_connected

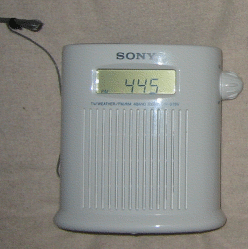
Think: I acquired a Sony ICF-S79V shower radio to listen to current events because I was falling behind now that podcasts were filling my radio time. After a few morning of bouncing back and forth between presets station during commercials i was frustrated b/c that was the beauty of podcasts, no commercials. (mr curry please help establish a standard for shows so we can scrape the commercials if we so choose to.) So back to my thoughts, how do I get podcasts to work with my shower radio?

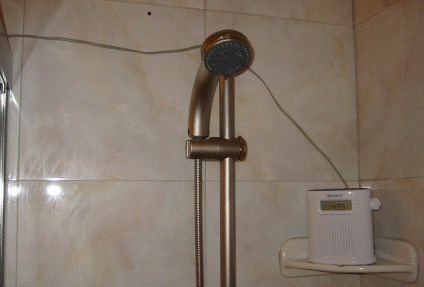
sony_shwr_radio


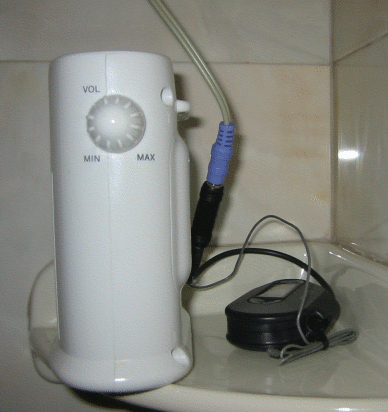
Create: Simple solution (and probably clear by now). What is the only way to get input into this device, RF! I had a Belkin RF transmitter that worked poorly in my car but had everything I needed for this project. I was hoping to setup the RF outside the shower but I literally have to wrap the little antenna around the transmitter. I stopped over at radioshack to get an Audio-Coupler and pulled a stereo to stereo-stereo connector from an older PC speaker system. The next challenge was power! The best solution (and i am still impressed) was good 'ol Energizer Ni-Mh rechargeable batteries and the energizer charger from buy.com. I did some research on what all the specs meant and they came up as the best for price. All this for 10~15 minutes of audio freedom. I think its worth it!

spr_full_set_scaled


Complete: This setup has been working for me for the last 4 or 5 weeks. I have a routine were i charge the 3 C batteries (+1 C battery in storage b/c you have to buy and charge them in pairs, how convenient) every 2 weeks. One issue I have had was when removing the batteries and charging it overnight I loose the presets and time on the radio. I am going to invest in standby C (regular) batteries so i can the time in the device. The RF transmitter needs to charge its 2 AAA batteries whenever it dies, haven't figured out its pattern yet. My creative muvo has 1 AAA labeled #1 and when the #2 battery is dead they both go into the charger. Sounds really silly but it works like a charm. Now to figure out if the steam will affect my devices ... time will tell.

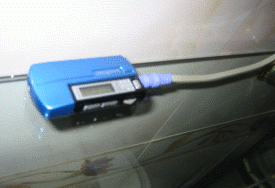
mp3_player over_the_top

I stayed away from “plug in the outlet” components here for my safety. I do NOT recommend using A/C electricity for anything in this project ... be safe! Also when dealing with water, i am willing to sacrafice any parts used in this project so please understand what you are doing ... enjoy!

Thank you joanna for the sony radio [christmas], and the mp3 player & fm tuner [valentines].

nickc316 at gmail.com